Adding/Editing Signal Mast Logic
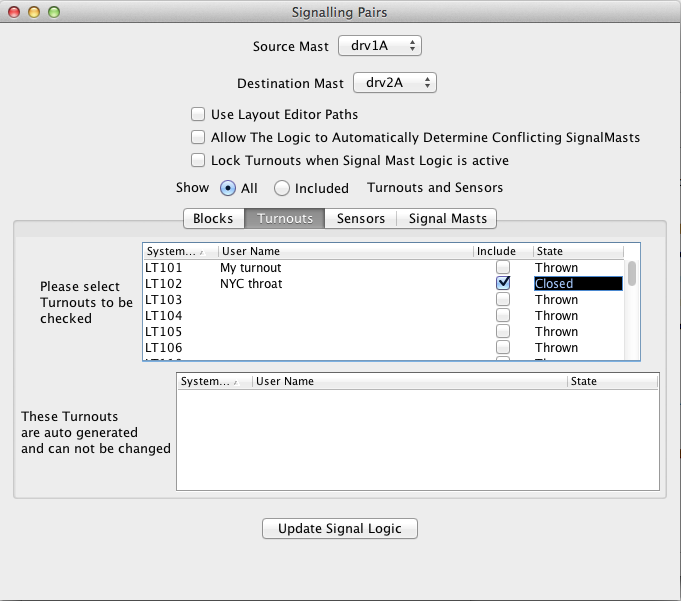
After clicking on the "Add..." button below the Signal Mast Logic Table, the following pane appears:

Start creating a Signal Mast Logic by selecting a
Source Signal Mast followed by a Destination
Signal Mast from the pop-ups.
The Source (Signal) Mast is the one which you wish
to control in this Pair and set the Appearances on.
The Destination (Signal) Mast is the next signal mast down
the line. The Appearance of the Destination Mast along
with the state of the Turnouts and Blocks that you select
on this pane will have a direct effect on the Appearance of
the Source Mast.
If you are not using the Layout Editor, then no
validation is performed of the Source and Destination Signal
Masts. If the Layout Editor is being used, then the system
will try and determine if the Destination Mast is reachable
from the Source Mast and warn you when a connection is not
found
The check box "Use Layout Editor Paths" allows you to get
JMRI to automatically generate the required Blocks, Turnouts
and Signal Masts, along with their states, that are located
between the source and destination Signal Masts.
Upon selecting "Use Layout Editor Paths", two further check
boxes will appear: "Use Turnout Details From Layout Editor"
and "Use Block Details From Layout Editor". Selecting either
of these will determine what information from the Layout
Editor is used when the system automatically generates the
route.
The automatically generated information is not saved with the
panel file, but it is generated each time the layout panel is
opened.
If the information on the Layout Editor panel
is edited, changes are not immediately reflected in the
Signal Mast Logic; you will need to store the panel, close
JMRI and re-open the panel for the Signal Mast Logic to be
updated.
The "Allow The Logic to Automatically Determine Conflicting SignalMasts" option tries to determine which Signal Masts could possibly cause a conflicting route if they were not set to danger.
The "Lock Turnouts when Signal Mast Logic is active" feature allows you to selectively disable accessory (Turnout) commands from cabs and/or locally-wired pushbuttons. When selected, JMRI disables pushbuttons by sending pushbutton disable commands to the Turnout decoders when the route is locked, and enables the pushbuttons when the route is unlocked. When locking a Turnout from cab commands, the JMRI program will monitor the Turnout's accessory address and if it detects a change command from a cab, will cancel the command immediately by sending out the opposite command to the Turnout. All Turnouts that are being monitored by the JMRI program and are included in the route will be locked.

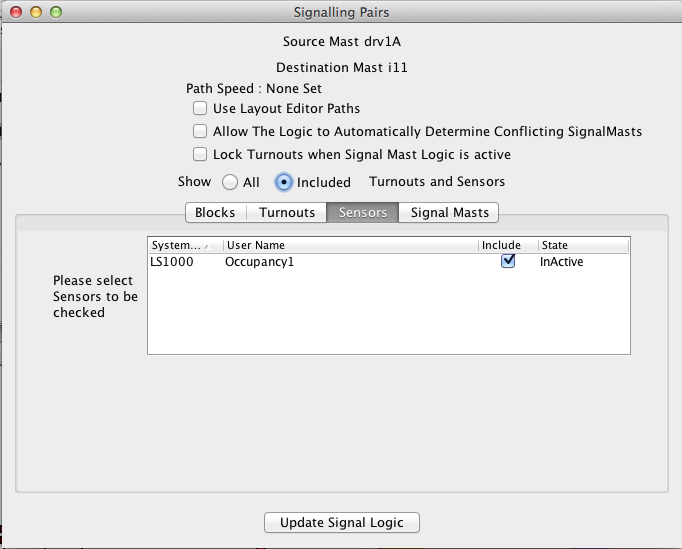
The "Show" radio buttons allow you to show All or only the Included Turnouts, Sensors, Blocks and Signal Masts that are selected as part of this Signal Mast Logic.
There are four tabs below the "Show" buttons, each
containing the details of Blocks, Turnouts, Sensors and
Signal Masts that make up the Signal Mast Logic for this
Source Mast. In each of these tabs, there is an editable
table that allows you to manually select which item(s) should
be included in the Signal Mast Logic and the State which each
of those items should be in.
Below that is a second table that shows the automatically
generated items (except under the Sensors tab). Manually
entered items over-ride the automatically generated items,
therefore if you wish to over-ride any item in this
automatically generated list then select the corresponding
item and set the state in the upper table. Click the
"Include" box in any of the tables to add the desired item to
your Signal Mast Logic. Next to the "Include" box is the
State option which that item must be in for the Source Signal
Mast to come active.
For example, if you wish a Turnout to be
in a Thrown state to trigger the Signal Mast Logic, then
select "Thrown" in the drop down box. If you wish to
over-ride a Turnout that was automatically included, and you
don't care what state it is set to, check "Include" in the
upper table and select "Any State" from the drop down
box.
Clicking on the "Update Signal (Mast) Logic" button will
add or update this Signal Mast Logic to the system. Once
added, the tables holding the automatically generated data
will be re-populated.
Tip: To update/fill the State column under the Signal Masts
tab, update & reopen the Signal Mast Logic item.
Back to the Signal Mast Logic Table help page.
