The Switchboard Editor
since 4.7.3Switchboards provide a visual control grid for your JMRI layout "out of the box".
To create a new Switchboard, from the Panels menu, choose New Panel > Switchboard Editor.
A default pane with switches for Turnouts in the range 1 - 24 opens.
If any Turnouts were defined in JMRI beforehand, those switches will immediately show their current state and let you control them.
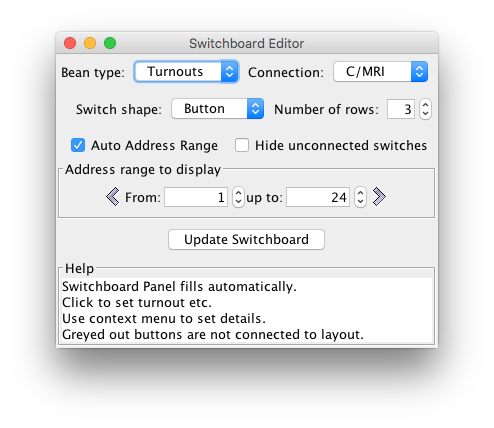
To the left, a small Switchboard Editor pane allows you to refine what this Switchboard will control. Select an option for:
- Bean type - to control a range of Turnouts, Sensors or Lights
- Connection - select Internal or an active JMRI connection
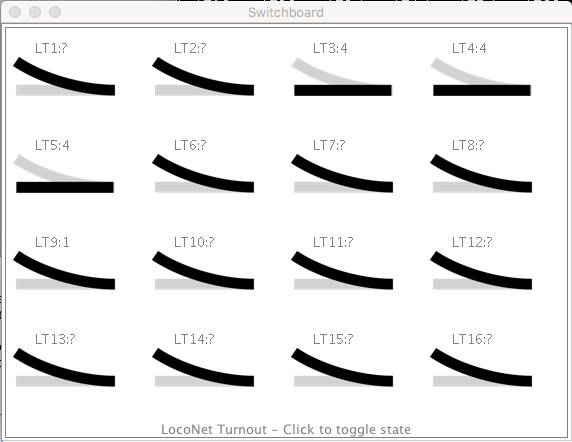
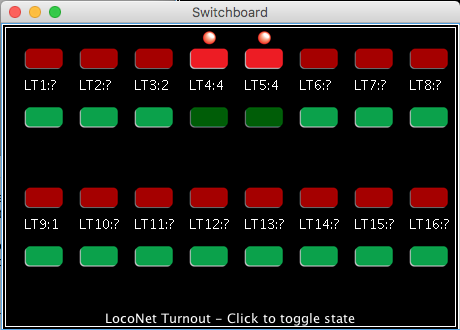
- Switch shape - pick a visual presentation for the switches:
- Button - standard Java buttons
- Slider - a modern interface popular in smart phones
- Key - the classic layout keyboard inspired by the Märklin hardware Keyboard
- Symbol - schematics like the traditional (Control) Panel
- Set the number of rows of switches to be displayed (number of items per row is calculated)
- Select Hide unconnected switches to only show switches for items connected to hardware
- Auto Address Range (selected by default)since 4.13.4 makes it easy to use the left/right arrows on the pane to jump to the next set of hardware addresses while keeping the number of items on the board the same.
Optionally, change the background color for this Switchboard via the Options menu. To use the new settings, click [Update Switchboard] to replace all current items on the board. Note that hybrid Switchboards containing more than one bean type or connection are not saved to disk. You can create and save separate Switchboards for different connections, address ranges and object types like Turnouts. Change the name of this Switchboard by choosing Rename Switchboard... from the Edit menu while the Editor is open.
When ready, close the Editor by clicking the Close box in its title bar or Close Editor from the File menu. Open the Editor at any time from the Switchboard's Edit menu.
Quick Reference Guide - Using the Switchboard
Clicking on an active switch on the board will send an instruction to the layout to toggle the item (on/off, closed/thrown). Depending on the hardware, the switch on the board will change to show the new state.
A tooltip appears when you hover your mouse over a switch, showing the user name of that item (if it's connected and set).
Right-click a switch to open a context-menu and:
- Set the user name of a connected item (stored in the item, not in the board)
- Attach a new item to an inactive switch (using the name of the switch and the object type as set in the Editor)
- Invert a turnout so it displays the intended state (depending on protocol support)
- To come: flip the switch icon to better represent the position of the connected turnout
Remember to save your setup and configured items by choosing Store Panels... from the File menu.
You can have your Switchboards open automatically upon startup by setting them as as a Startup Action under Preferences > Startup.
Back to the PanelPro help page.
Thanks and congratulations to all who contributed!
Copyright © 1997 - 2018 JMRI Community.
JMRI®, DecoderPro®, PanelPro™, SignalPro™, TrainPro™, DispatcherPro™, OperationsPro™ and associated logos are our trademarks.
Additional information on copyright, trademarks and licenses is linked here.
Contact us via the JMRI users Groups.io group.
Site hosted by:
![]()
See also the site status page.