JMRI: Advanced Icons in PanelPro
Memory Icons
Memory objects are meant for scripting control; the first implementation is a MemoryIcon that lets you put a multi-state icon on the screen.MemoryIcon objects work two ways: If a series of icons is defined in the file, the memory contents will be translated via this table (this was the original behavior). If there aren't any icons defined, the memory contents is displayed directly, as a string if it's a String and as a NamedIcon if it's a NamedIcon.
See xml/samples/MemoryIconExample.xml for info on how to set this up.
Reporter Icons
 The first implementation of
Reporter is Digitrax transponding. By adding the appropriate
elements to your Panel files, you can show decoder ID
information on your Panels.
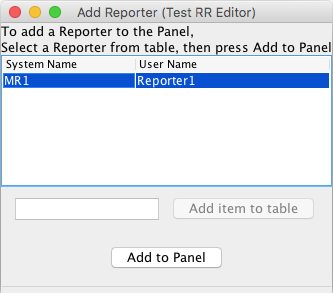
A Reporter's value can be displayed on a Panel via an icon. To do this:
- On the Panel Editor window for your Panel, find the "Add Reporter" button.
- In the text box next to that button, type the user name or System Name of the desired Reporter.
- Click the "Add to Panel" button. The Reporter icon will be placed on your Panel. If it's not visible, that might be because the value is currently blank; use the Reporter Table to change the value to something that will be visible.
- You can drag the icon to where you want it in the usual way.
- The pop-up menu on the icon will let you change the formatting.
See xml/samples/ReporterIconExample.xml for info on how to set this code up by hand.
- First check that JMRI is seeing the LocoNet messages OK. From the tools menu, open the "Reporter Table". Run a locomotive across your transponding sections, and you should see the arrival and departure status show up on one of the lines in the table.
- Next, you need to add the "ReporterIcon" that displays
this directly to the panel file.
Look in the "xml/samples" directory within JMRI for a file called "ReporterIconExample.xml".
(It's also available on the web but many browsers will try to interpret it instead of showing you the text; your browser's "View Source" option might help with that)
You'll see this line:
<reportericon reporter="LR12" x="10" y="10" class="jmri.jmrit.display.configurexml.ReporterIconXml"/>
The "x" and "y" define where you want it on your panel. The "LR12" is the name of the reporter object, e.g. the name of the one you saw changing when you were looking at the table.
- Open your panel file with your favorite editor (WordPad
if you've got nothing you like better), and insert a line
like that above right _after_ the line that starts with
<paneleditor class="jmri.jmrit.display.configurexml.PanelEditorXml"
(The "paneleditor" line starts a new panel. If you have more than one panel in the file, you'll have to look for the panel title to see where to insert the new line)
