JMRI: LogixNG Documentation
JMRI has for a long time had the tool Logix which can be used to setup rules, for example that a signal should go to green if some turnouts are in a predefined state. Logix does its job well, but is difficult to extend with new functionality.
LogixNG, short for Logix Next Generation, is a complete rethink of the concept. It's modular, which means it's easy to extend LogixNG with new functionality and it's easy to test each part of LogixNG.
LogixNG have building blocks that are similar to Logix. A LogixNG is the same as a Logix. A ConditionalNG is the same as a Conditional. An expression in LogixNG is similar to a conditional variable in Logix and an action in LogixNG is similar to a conditional action in Logix.
LogixNG also has references and tables. A reference is an indirect pointer to an item on the layout. For example, if the memory IM1 has the value "IT1", the reference {IM1} points to the turnout IT1. This means that if an action has the command "set turnout {IM1} to thrown", it means that LogixNG reads the memory IM1, which in this example has the value IT1, and then sets the turnout IT1 to thrown.
References can be used to change which turnout to use, which is very useful to setup generic rules. If a particular rule is common for many places on the layout, references can be use to use that single rule for all these cases.
LogixNG also adds tables to JMRI. A table is similar to Memory but has one or two dimensions. Each row and each column in the table may be given a name, which means that a single cell in the table can be referred to with the row name and the column name. Tables are in particular intended to be used together with references, to make it easy to setup complex configurations. A table can be created in a spreadsheet software like Microsoft Excel or LibreOffice Calc and then exported as an CSV file and imported to JMRI.
Contents
The documentation below describes LogixNG, and discusses how to set them up. The documentation is divided into sections; click below for easy access to a listed section. If you prefer to try before reading much, read Introduction to LogixNG, then click Getting Started and follow those instructions. Return here to read about what you did.
- Introduction to LogixNG
- LogixNG system names
- What are LogixNG
- ConditionalNGs
- The Edit ConditionalNG Window
- The Logical Expression
- Triggering the Actions
- The Actions
- Getting Started
- Enabled and Execution enabled
- Additional Notes
- Scripts
- List of actions and expressions
Detail State Variable and Action Lists:
ConditionalNG Editor details:
Introduction to LogixNG
For those who are used with Logix, it's important to note that LogixNG is similar, but different.
The main building blocks in LogixNG are actions and expressions. An action do something, for example throwing a turnout, set a signal or run a script. An expression asks a question, for example if turnout LT2 is closed, or if sensor IS255 is active.
The actions and expressions are organized in trees, there each tree is a ConditionalNG. The ConditionalNGs are organized in LogixNGs.
An action or expression may have other actions and/or expressions as children, which allows the user to build a complex structure with simple building blocks.
Example:
One common root of the tree is the IfThenElse action. It has one
child expression and one or two child actions. It evaluates the
expression and if the expression answers true, the
"then" child action is executed. But if the expression answers
false, the "else" child action is executed instead.
LogixNG system names
System names in JMRI consists of a system prefix and a type letter. For LogixNG, the system prefix is usually 'I' and the type letter is 'Q'. But LogixNG consists of several sub types and if all of them would have its own type letter, the letters in the alphabet would run out. Therefore LogixNG has sub type letters, except for LogixNG itself.
There is usually no need to work directly with system names and it's recommended to let JMRI to auto generate them. But they can be created manually if desired.
LogixNG types and example system names
| LogixNG type | System name | Auto system name |
|---|---|---|
| LogixNG | IQ0001 | IQ:AUTO:0001 |
| Analog Action | IQAA0001 | IQAA:AUTO:0001 |
| Analog Expression | IQAE0001 | IQAE:AUTO:0001 |
| ConditionalNG | IQC0001 | IQC:AUTO:0001 |
| Digital Action | IQDA0001 | IQDA:AUTO:0001 |
| Digital Boolean action | IQDB0001 | IQDB:AUTO:0001 |
| Digital Expression | IQDE0001 | IQDE:AUTO:0001 |
| String Action | IQSA0001 | IQSA:AUTO:0001 |
| String Expression | IQSE0001 | IQSE:AUTO:0001 |
| Table | IQT0001 | IQT:AUTO:0001 |
"Auto system name" refers to system names that are generated automaticly.
All system names consists of the system prefix, the type letter, possible a sub type, possible :AUTO: and a number. The number may begin with zeros and the system name IQ1 is different from the system name IQ0001.
The LogixNG data types Map and Table are used to make generic LogixNGs. For a table, its columns and rows can also be accessed as NamedBeans.
LogixNG table structure
A Table is a data type that holds a two dimensional array, like a spreadsheet.
Example:
| A | B | C | D | |
|---|---|---|---|---|
| 1 | IQT22 | Yard table | ||
| 2 | West yard | East yard | North yard | |
| 3 | Left entrance of the yard | |||
| 4 | Leftmost turnout | IT101 | IT201 | IT301 |
| 5 | Left turnout | IT103 | IT203 | IT303 |
| 6 | Right entrance of the yard | |||
| 7 | Rightmost turnout | IT112 | IT212 | IT312 |
| 8 | Right turnout | IT114 | IT214 | IT314 |
LogixNG can use references to access layout items like turnouts in an indirect way. It's done by entering the system name or user name in curly brackets. If a ActionTurnout has the turnout IT1, it will access that turnout directly. But if the ActionTurnout has the turnout {IM2}, it will read that memory and if that memory has a string as a value, it will use that string value to find the turnout. So if the memory IM2 has the value IT5, and the ActionTurnout has the turnout [IM2], the ActionTurnout will read the memory IM2 and find out that it points to the turnout IT5 and therefore do it's action on turnout IT5. The benefit of this is that the Memory can be changed during execution and therefore the same ActionTurnout can be used to access different turnouts at different times.
It's possible to use indirect access recursive. If a ActionTurnout has the turnout {IM5}, and that Memory has the value {IM14}, and that the Memory IM14 has the value IT3, the ActionTurnout will access IT3. The ActionTurnout has an indirect turnout IM5 so it will read that Memory. And since that memory has the value {IM14} which also is an indirect access, it will read the memory IM14 and find out that it has the value IT3, and therefore use IT3. This is also true for tables. If the cell IQT1[5,3] has the value '{IM3}', and the memory IM3 has the value 'IT5', the cell IQT1[5,3] will point to IT5.
A table can be used to create a lookup table. It's accessed by either its system name or its user name, followed by a left square bracket, the name of the column, a comma, the name of the row, and a right square bracket.
Instead of the names of the row and column, it's also possible to use the row number or the column number. Note that row 1 has the system name and user name of the table, row 2 has the names of the columns, and column 1 has the names of the rows. Note that for columns, 1 is row A, 2 is row B, 22 is V, 23 is W, 26 is Z, 27 is AA and 28 is AB.
Note that spreadsheet software, like Excel and LibreOffice Calc, has cell <column letter><row number> while references in JMRI has table[row,column]. Example: Cell B3 is table[3,2], since B3 is row 3 and column 2.
Example from the table above. These examples assume that IM3 has the value 'West yard', IM4 has the value 'Rightmost turnout' and IM5 has the value 'IQT22'.
| Cell | Value | Note |
| IQT22[1,1] | IQT22 | Cell A1 has the system name of the table |
| IQT22[1,2] | Yard table | Cell B1 has the user name of the table |
| IQT22[2,2] | West yard | Cell B2 has the name of column B |
| IQT22[4,1] | Leftmost turnout | Cell A4 has the name of row 4 |
| Yard table[4,1] | Leftmost turnout | The user name of the table can be used to access the table |
| IQT22[5,3] | IT203 | Cell C5 has the value 'IT203' |
| IQT22[Left turnout,North yard] | IT303 | Column 'North yard' and row 'Left turnout' has the cell D5 with the value 'IT303' |
| Yard table[Left turnout,North yard] | IT303 | Column 'North yard' and row 'Left turnout' has the cell D5 with the value 'IT303' |
| IQT22[Leftmost turnout,{IM3}] | IT101 | IM3 is in curly brackets and have the value 'West yard' so this points to cell B4 |
| IQT22[{IM4},East yard] | IT212 | IM4 is in curly brackets and have the value 'Rightmost turnout' so this points to cell C7 |
| IQT22[{IM4},{IM3}] | IT112 | Column {IM3} and row {IM4} points to cell B7 |
| {IM5}[{IM4},{IM3}] | IT112 | Even the table name can be accessed indirectly |
Note that a Memory can point to a table. For example, if the memory IM7 has the value '{Yard table[{IM3},Leftmost turnout]}', LogixNG will look at IM7, and find that it's value is in curly brackets. It will then resolve the value inside these curly brackets, which is 'Yard table[{IM3},Leftmost turnout]'. It will then resolve the value of IM3 which has the value 'West yard'. It will then get the table cell 'Yard table[West yard,Leftmost turnout]' which is cell B4 with the value 'IT101'.
The ActionForEach iterates over a comma separated list of values. It can be used with tables by using the keywords __columns__ and __rows__ . Note that it's two underscore characters before and after. {IQT1[__columns__]} gives a comma separated list of all the column names in the table IQT1. {IQT1[__rows__]} gives a comma separated list of all the row names in the table IQT1. It's also possible to write {Yard table[__columns__]} and {Yard table[__rows__]}. You can even use this syntax in ActionMemory to assign a Memory the list of column names or row names. Note however that column names or row names that are empty is seen as colums or rows with a comment and therefore they are not included.
Tables are loaded by a start up action. They are created in a spreadsheet, like Microsoft Excel or LibreOffice Calc and then exported to a CSV file, separated by TAB characters. The table is read only and is not stored in the panel filee, so it must be reloaded each time JMRI starts.
Note
If a name has the characters comma, left or righ square bracket or left or right curly brackets, these characters must be escaped by preceding them with a backslash. Examples: \, \[ \] \{ \} \\
If a reference contains a backslash, it will take some more time to evaluate it than if it doesn't contain any backslash. So if it's possible to not use these special characters in references or names of beans, it's recommended.
What are LogixNG?
If a LogixNG is enabled and not is being created or edited, a LogixNG is "active", which means that the entities (turnouts, sensors, lights, etc.) in logical expressions of the LogixNG's ConditionalNGs are being monitored. Whenever the state of any of the monitored entities of a ConditionalNG changes, that ConditionalNG "calculates" its logical expression. If the result of the calculation changes the value of the logical expression, then the specified actions of the ConditionalNG are taken.
The LogixNG Table
A LogixNG is defined via the LogixNG Table that can be accessed by selecting LogixNG Table in the Tools menu. The LogixNG Table lists all currently defined LogixNG by their System Name and User Name. The table also shows whether a LogixNG is "Enabled". The last column of the table provides an easy way to edit a LogixNG and its ConditionalNGs. Clicking the Select choice box for a LogixNG, will drop down a menu with four choices; Edit, Browse, Copy and Delete. Each choice will bring up a pane for the corresponding operation.
LogixNG Table controls
- Below the LogixNG Table is the Add... button.
- The Options menu has three sections:
- The first section lets you Enable or Disable all LogixNGs.
- The second section lets you select a user name selection method. See the LogixNG Options menu for details.
- The third section lets you select a ConditionalNG Editor. See the LogixNG Options menu for details.
- The Tools menu contains five LogixNG maintenance tools:
- Open picklist tables
- Find orphaned items
- Find empty ConditionalNGs
- Find Cross References
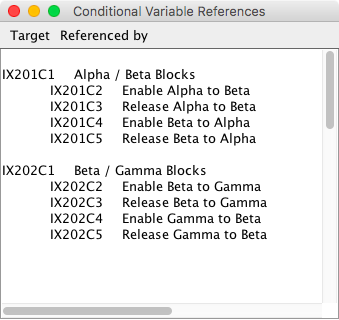
- ConditionalNG Variable References
Creating a new LogixNG
To create a new LogixNG, click the Add... button at the bottom of the LogixNG Table pane. This will bring up a Create LogixNG window. Entering a System Name and a User Name, then clicking Create LogixNG, will create the LogixNG, and bring up the Edit LogixNG window. This window allows ConditionalNGs to be created and edited. Once a LogixNG is created, its System Name cannot be changed. Its User Name, however, may be changed in either the LogixNG Table or the Edit LogixNG window. A new User Name may be any useful text, provided the new User Name was not previously assigned to another LogixNG.
A LogixNG is named using the JMRI convention. The System Name for the LogixNG always must begin with the two letters IX and is usually followed by a number selected by the user. For example, valid LogixNG System Names include: IX1, IX34, and IX100. The user name is whatever the user wants to use to identify the particular LogixNG, for example, "Signal 5 Control". As a convenience to the user, if the entered System Name does not begin with IX, the program will add IX in front of what is entered. For example, to enter a System Name of IX32, simply enter 32 in the System Name field, and the program will do the rest.
The Edit LogixNG window displays the System Name and User Name of the LogixNG at the top. The User Name may be changed by entering/modifying the text in the User Name field. Next is a table of ConditionalNGs belonging to the LogixNG. To add a new ConditionalNG, click the New ConditionalNG button under the ConditionalNG Table. This will create a new ConditionalNG and open the Edit ConditionalNG window allowing the logical expression and actions of the new ConditionalNG to be defined. An existing ConditionalNG may be edited by clicking the Edit button of that ConditionalNG in the table. The User Name of the ConditionalNG may be changed in the table. The User Name of a ConditionalNG may be any useful text, provided it is not the same as the User Name of another ConditionalNG in the same LogixNG. The User Name may be the same as the User Name of a ConditionalNG in another LogixNG. When editing the User Name (or any item in any JMRI table) please remember to move to another cell in the table so that the program is notified that you have finished your entry, otherwise the entry may not take effect.
Clicking Calculate under the ConditionalNG Table causes all ConditionalNGs of the LogixNG to be calculated. Resulting states are displayed in the State column of the table. However, since the LogixNG is being edited it is inactive and therefore no ConditionalNG actions are taken. When the editing of the LogixNG is done, the LogixNG is activated and may be enabled to allow ConditionalNGs to execute their actions.
The order of ConditionalNGs in the ConditionalNG Table may be changed by clicking Reorder (below the ConditionalNG Table). Clicking Reorder changes all edit buttons in the last Column of the table to First. Select the ConditionalNG that is to be first, and it is immediately moved to the top of the table. All remaining buttons change to Next. Select remaining ConditionalNGs in desired order, until all buttons change back to Edit.
The only time when the ConditionalNGs are evaluated in the order listed is when all of their states are UNKNOWN, such as when the LogixNG is being enabled. ConditionalNGs are evaluated when one of their expressions changes its state. If an entity is used as a expression in more than one conditionalNG, it is indeterminate which conditionalNG is evaluated first.
When Done is clicked at the bottom of the Edit LogixNG window, any change in the LogixNG User Name is checked and made. A check is made for inconsistencies in specifying that an entity (sensor, turnout, etc.) referenced in multiple expressions is not monitored as a trigger for calculation of the LogixNG, and a warning message appears if any inconsistencies are found. Then the LogixNG is activated, the Edit LogixNG window is dismissed, and the user is returned to the LogixNG Table. Immediately before the LogixNG is activated, the state of all its ConditionalNGs is set to UNKNOWN. Immediately after activation, all ConditionalNGs are calculated.
The Edit LogixNG window also provides a way to delete a LogixNG if it is no longer needed. Click Delete LogixNG to delete the LogixNG being edited and all its ConditionalNGs. This operation can also be done by selecting the Delete item from the drop down Select menu on the LogixNG Table.
Selecting the Browse item from the drop down menu on the LogixNG Table will open a window with a list showing the details for each conditionalNG. It is an effective way to review the entire contents of a LogixNG. Click on the close button to close the window.

Selecting the Copy item from the drop down select menu on the LogixNG Table will show a series of dialog windows that provide a way to copy the LogixNG and any or all of its ConditionalNG to a new or existing LogixNG.
ConditionalNGs
A ConditionalNG's System Name has the form IXnnnnCmm, and is set automatically when the ConditionalNG is created by the user clicking New ConditionalNG in the Edit LogixNG window. The System Name of the first ConditionalNG for LogixNG IXnnn will always be IXnnnC1, the second ConditionalNG will have System Name IXnnnC2, and so on. The User Name of a ConditionalNG is whatever the user wants to assign to identify the use of the ConditionalNG. An entered User Name must not be used by more than one ConditionalNG within a given LogixNG, however. The System Name and User Name are displayed at the top of the Edit ConditionalNG window. The User Name may be entered/edited there or in the ConditionalNG Table of the Edit LogixNG window. The User Name of a ConditionalNG may be any useful text, provided it is not the same as the User Name of another ConditionalNG in the same LogixNG. The user name may be the same as the User Name of a ConditionalNG in another LogixNG.
As mentioned above, ConditionalNGs are statements of the form:
if (antecedent) then (consequent).
Therefore a ConditionalNG has two distinct parts: its "logical expression" and its "actions". These are discussed separately below.
Logical expressions connect the states (true or false) of "expressions". State variables test conditions on the layout or in the program, for example, if a sensor is active or inactive, if a turnout is closed, if a signal head is red, if the fast clock time is between 10:00 and 11:00, etc. State variables are linked together in a logical expression by logic operators. For a list of currently available expressions, see State Variables
Logic operators currently available are NOT, AND, AND NOT, OR and OR NOT. The AND operator is set up automatically by the program. For each expression, the user selects whether the NOT operator is to precede the expression. If the NOT operator precedes the expression, the true/false value of the expression is reversed. For example, if "Sensor Active CS5" is true, "NOT Sensor Active CS5" will be false, and vice versa. Note that "Sensor Active CS5" is sometimes not the same as "NOT Sensor Inactive CS5", because Sensor CS5 may be in the UNKNOWN state.
Logical expressions read like written statements. It is easy to set up a logical expression to evaluate many situations on the layout. For example, "if block 10 and block 11 are occupied and turnout 20 is thrown" would be set up as:
Sensor "LS1020" is Sensor Active AND Sensor
        "LS1021" is Sensor Active AND Turnout "LT20" is Turnout
        Thrown
where LS1020 is a sensor that is true when block 10 is occupied (perhaps from a BDL168), sensor LS1021 is true when block 11 is occupied, and Turnout Thrown LT20 is true when turnout LT20 is thrown. This logical expression would calculate to true if all three of the expressions are true, i.e., if block 10 is occupied AND block 11 is occupied AND turnout 20 is thrown; otherwise it would calculate false.
Actions may be specified for each ConditionalNG. A number of action types are available. For example, Set Turnout, Set Signal Appearance, Trigger Route, etc. For a list of currently available action types, see Actions. Each action has a user selectable option of being performed if: 1) the logical expression changes to true, 2) the logical expression changes to false, or 3) the logical expression changes. This means a conditionalNG may actually be three statements.
- if (antecedent is true) then (do "on change to true" actions)
- if (antecedent is false) then (do "on change to false" actions)
- if (antecedent state changes) then (do "on change" actions)
The Edit ConditionalNG Window
The Edit ConditionalNG window is where logical expressions are set up and where actions are specified. The Edit ConditionalNG window is displayed when a ConditionalNG is created, or when the Edit button of a ConditionalNG is pressed in the Edit LogixNG window. The Edit ConditionalNG window displays the System Name and User Name of the ConditionalNG at the top. The User Name may be edited by entering/modifying the text in the User Name field. Any text may be used, provided it doesn't duplicate the user name of another ConditionalNG in the same LogixNG. Next are two sections--one for the setup of a logical expression and one for set up of the actions.
The Logical Expression
The logical expression section contains a table of state variables, with two buttons and a drop down menu box below. The drop down menu allows the choice of what logical operators to use in the antecedent. The choices are: all AND's, all OR's or Mixed. Mixed allows the user to specify any combination of AND's, OR's and NOT's. When this choice is made the logical expression requires parentheses in order to be unambiguous. So, when this choice is made, a text field is displayed so that parentheses can be inserted and the expression modified. The expressions are represented in the expression by their row number.
The first column in the expression table is the row number of the variable. The next column displays the logic operation preceding the variable in the expression. In the case of "Mixed" a choice box allows the user to choose an operation. However these choices can be changed in the antecedent text field and it is the text field expression that the ConditionalNG uses to determine its state. The third column contains a choice box that allows the user to select the NOT operator as needed.
The fourth column is a description of expression and the condition to be monitored to be for its state to be true. The next column shows the state that was last tested for the variable (true or false). The state displayed includes the effect of the NOT operator, if NOT is selected.
The "Trigger" column sets whether the expression should cause the ConditionalNG to perform its actions when this variable changes. Note that the current states of all the variables are always used in the calculation of the ConditionalNG's state. The "Trigger" setting allows a state variable to be "passive" and not cause the conditionalNG to evaluate its state. That is, such a variable state is a necessary condition, but not a sufficient one to cause any actions to take place.
Note: Disabling expression triggers should be done with caution. Actions are performed only when the state of the logical expression changes. Disabling a trigger can prevent actions from be executed even when this state has changed.
Next is a column of Edit button to modify an existing expression. The last column of the table (Delete buttons) is used to delete a expression if you decide it is no longer needed.
Press the Add State Variable to add a state variable (a row in the State Variable table). This brings up a window with a choice box for the user to select a state variable type. Available expressions are documented at State Variables. When a type is chosen the Edit Variable window displays a text field for the name of the entity to be used for the expression. When a name (either System Name or user name) is entered, it must correspond to an existing entity (sensor, turnout, light, etc.). Depending on your selection method, a tabbed Pick List, a single Pick List or a dropdown combo box will be displayed to aid in name selection.
At any time during the entry of expression data, the Check State Variables button may be clicked to check the entered data and evaluate the expressions. When this button is pressed, the checking and evaluation proceeds until the check completes successfully, or an error is detected. If an error is detected, the checking stops for the user to correct the error and click Check State Variables again. Please remember after editing the System Name and data items to click a different cell in the table before clicking Check State Variables (or Update ConditionalNG at the bottom of the window) so that the program is notified that you have finished your entry. Otherwise your entry may not take effect, and an error may be reported unnecessarily.
Triggering the Actions
There are two policies that can be taken after a conditionalNG's state is evaluated:
- Execute the conditionalNG actions only if the state of the conditionalNG has changed
- Execute the conditionalNG actions regardless whether the state has changed
Which policy to use is chosen by the radio buttons in the middle of the Edit ConditionalNG window. The Execute actions on change of state only button prevents unwanted behavior from occurring when multiple instances of the "on true" or "on false" actions are executed. That is, if successive triggers cause the logical expression to be evaluated to the same state, only the first trigger will execute the actions. Normally, it is best for a conditionalNG to execute its actions only when the state of the conditionalNG changes. However, if it is important to maintain the actions associated with a particular state of the ConditionalNG the Execute actions whenever triggered button should be used. If external events undo some of the actions of the conditionalNG but do not change the state of the conditionalNG, then this policy will execute the action on any trigger.
The Actions
The Actions section of the Edit ConditionalNG window contains a table of actions, with two buttons below for adding a new action and reordering the list of actions. The section provides for specifying the actions to be taken when a ConditionalNG is calculated and changes its state. The action table consists of a column for the description of the action to be taken and two columns of buttons, Edit and Delete, for editing or deleting an existing action. To add a new action, press the "Add Action" button. A new "Edit Action" window will appear. Select an action type in the type box, and data items needed to completely specify the action will appear to the right of the type box. When a name must be entered, the name must correspond to the System Name or the User Name of an existing entity (sensor, turnout, signal head, etc.) of the proper type. Depending on your selection method, a tabbed Pick List, a single Pick List or a dropdown combo box will be displayed to aid in name selection. Available action types are described in detail at Actions. If you use User Names to specify your actions, the same caution noted above applies. Be very careful when editing User Names that are used to specify actions.
For each action, three options are available for when to perform the action: 1) On Change to True, 2) On Change to False, and 3) On Change. These refer to the calculated state of the ConditionalNG, which is equal to the value of the logical expression as specified in the expression table. One of these options must be selected. When done, click either "Update" to install your changes, "Cancel" to close the window without any changes or "Delete" to remove the action entirely.
To change the order order of the ConditionalNGs in a LogixNG, or the order of the actions in a conditionalNG click the "Reorder" button. The right-most buttons in the table will then let you select the first one, next one, etc. Note however, this is merely the order in which the commands are issued but do not guarantee that their final effect will occur in the same order. If it is necessary to have actions take place in a specified order, use separate ConditionalNGs for each action and chain the ConditionalNGs such that a preceding action's completed state is the expression for the succeeding action.
Activating the ConditionalNG
When the logical expression and actions have been specified, click Update ConditionalNG at the bottom of the window. This initiates a check of the logical expression (the same as done by Check State Variables) and a check of entered data for actions. If the ConditionalNG's User Name has been edited, it is also checked. If an error is found, a message box opens announcing the error, and the update is stopped to allow the user to correct the error and click Update ConditionalNG again. If no error is found, the ConditionalNG is updated with the entered data, the Edit ConditionalNG window is closed, and the user is returned to the Edit LogixNG window.
Two other buttons are available at the bottom of the Edit ConditionalNG window. Clicking Cancel will close the Edit ConditionalNG window without updating the ConditionalNG. Clicking Cancel results in loss of any data that has been entered. The other button, Delete ConditionalNG, provides an easy way to delete an unneeded ConditionalNG. Click Delete ConditionalNG to delete the ConditionalNG being edited and return to the Edit LogixNG window.
Getting Started
The following steps let you create your first LogixNG and become familiar with how the LogixNG user interface works.
- Select Table -> LogixNG in the Tools menu.
- Click the Add... button below the LogixNG Table.
- In the Create LogixNG window that appears, enter 6 for System Name, and "test" for User Name, then click Create LogixNG.
- In the Edit LogixNG window that appears, click New ConditionalNG.
- In the Edit ConditionalNG window that appears, click Add State Variable to begin defining a logical expression for the ConditionalNG.
- In the new window that appears, click the "Variable Type" choice box to reveal a scrolling selection box. Select "Sensor".
- Note that a text field appears asking for entry of a sensor name. Enter the name (either System Name or User Name) of any of your existing sensors. (If you don't have an existing sensor, select Sensor Table in the Tools menu and create one.) Select Inactive from the Variable State drop down.
- Click the Update button and note the row entries that appear in the expression table.
- Click New State Variable to create another row in the table. Note that AND appears in the first column of the new row. Again select "Sensor" as the variable type, and enter the name and desired state of a different sensor (create it if needed).
- Click the third column entry of the second row to reveal the selection box for NOT. Select NOT, then click Check State Variables again. Note that the State of the second expression has reversed.
- For an Action click Add Action.
- In the new window that appears, click the "Action Type" choice box to reveal a scrolling selection box. Select "Turnout", and enter the name (System Name or User Name) of one of your turnouts. (If you don't have any turnouts, create one using the Add button in the Turnout Table.) Select Set Turnout for the Action Type, leave the "Turnout Position" option at "Closed" and "Change Option" at "On Change to True".
- Click the Update button and note the row entries that appear in the action table.
- For another Action - again click Add Action and select "Turnout". Enter the name of the same turnout entered before. Select "On Change to False" as the Trigger Option, and "Thrown" as the Turnout Position.
- Click Update to close the Edit ConditionalNG window and return to the Edit LogixNG window.
- Click Done to close the Edit LogixNG window and activate your new LogixNG. Click OK in the reminder-to-save dialog that appears.
You'll have created a LogixNG to control the setting of a turnout according to the states of two sensors. It's as simple as that. It took you more time to read this tutorial than to create the LogixNG.
Saving LogixNG to disk
LogixNG are kept in your layout configuration, along with Turnouts, Sensors, Signal Heads, control panel setup etc. To store this information on disk, allowing to reload it next time you run JMRI, use Store Configuration... in the File menu at the top of the LogixNG Table (or other tables from the Tools menu), or select Store Panel... in the Panel menu. Note that the enabled/disabled state of each LogixNG is saved in the configuration file.
Enabled and Execution enabled
The intention with LogixNG is to be similar to Logix, in order to make it easier for users of Logix to understand how LogixNG works.
This has resulted in a big challenge when it comes to Enabled, since in Logix, a Conditional that is not Enabled will still calculate its variables but not execute its actions.
In LogixNG, there is a need to be able to completely disable the calculation too, and not only the execution of actions. Therefore, in LogixNG, if a LogixNG or a ConditionalNG is not enabled, it's not evaluated at all.
But LogixNG also needed to be somewhat compatible with Logix, for example to be able to import Logixs to LogixNG. In order to solve that, LogixNG has execution enabled. If a LogixNG or a ConditionalNG doesn't have execution enabled, it's only evaluated but not executed.
There is however a problem with execution enabled . Not all of the actions supports this. Only the actions IfThenElse and Logix supports execution enabled.
Additional Notes
This section contains questions and answers that normally are not needed by LogixNG users, but in some cases were important or of interest for previous versions of LogixNG.
-
How is a LogixNG started?
Start of a LogixNG is similar to the way a light, a route, or other continuously running JMRI entity starts. Internally a LogixNG has an "activate" method, that is called when the LogixNG is created, after it is edited, or when it is loaded from a configuration file. This method starts listeners for items in the expressions of the LogixNG's ConditionalNGs. When any of these listeners fires (indicating that the watched property of a expression has changed), the LogixNG is calculated, resulting in appropriate actions being taken, provided the LogixNG is enabled.
-
When should Triggers Calculation be unchecked in an
expression?
Normally Triggers Calculation should be checked in all expressions that has this option, so a change in any of its expression will trigger calculation of a LogixNG. This results in the LogixNG quickly reacting to changes on the layout, and maintaining the status of signals, turnouts, etc. as desired. There are situations, however, where it is desirable to test the state of an entity, but not use it as a calculation trigger. The following paragraphs describe a couple of those situations, but there are others.
Occasionally a "logic loop" can result if triggering is not suppressed. For example, if the state of a turnout is tested in a expression, and the same turnout is set in an action of the same or another ConditionalNG of the same LogixNG, continuous triggering (a logic loop) could result. The easiest way out of this dilemma is to test the turnout, without using it as a triggering entity. This is done by unchecking Triggers Calculation in all expressions where the turnout is specified. If the turnout is used in expressions of more than one ConditionalNG of the LogixNG, it must be unchecked everywhere it is used to suppress using it as a trigger.
Another situation arises when Delayed Set Sensor action is used with an internal sensor to trigger a second LogixNG after the delay time has elapsed. If the second LogixNG is not to be triggered before the delay time elapses, all of its expressions, except for the delayed internal sensor, should be unchecked. This scenario might occur, for example, if a ConditionalNG turns on something as its first action, and sets a Delayed Set Sensor as its second action to turn off that something after a specified time provided certain conditions are met.
-
What is a "logic loop" and how can it be avoided?
A "logic loop" results when the program appears to slow down significantly or lock up as multiple LogixNGs are continuously triggered by changing references to each other. The best way to avoid a "logic loop" is to be aware of situations that can lead to a loop, and plan your logic to avoid such situations.
A "logic loop" can result within a single LogixNG when a expression (sensor, turnout, etc.) that triggers the LogixNG is also changed by that same LogixNG. The LogixNG editor will detect some situations that could result in a loop, and will issue a warning when you close the LogixNG. Heed these warnings! A warning doesn't mean that a loop definitely will result if you continue. The warning message is a "wake up call" that you should study carefully what you're doing to make sure a loop won't result.
A more complicated situation involving two or more LogixNGs can also result in a "logic loop". For example, if LogixNG 1 is triggered by sensor A, and has an action that changes turnout B, and LogixNG 2 is triggered by turnout B and changes sensor A, the potential for a loop exists as these LogixNGs trigger each other. You can easily extend this idea to triggering chains (loops) involving three or more LogixNGs, and even to interactions between LogixNGs and Routes. There is no test in the program to warn about loops involving multiple LogixNGs. (To develop such a test would be very difficult.)
-
What should I do if I think I have a "logic loop"?
When they do occur, "logic loops" can be a bit scary to trouble shoot. Your computer may appear to be locked up, or slowed to a crawl as the loop uses up most of the available computer time. Fortunately JMRI provides tools to help in design and debugging. Unchecking "Triggers Calculation" for a expression (discussed above), can help you design around loops when you have identified the LogixNG causing the looping problem. To get around the lock up or slow down problem, start with all your LogixNGs disabled, (see below) then enable them one by one until you discover the loop.
If the panel file containing LogixNGs loads automatically when the program starts up, press and release the shift key a few times rapidly as soon as you see the small JMRI splash screen (the first thing you see during start up). Your panel file will be loaded with all LogixNGs disabled.
If you load your panel file manually using the Panels > Open Panel... menu, before loading your file, go to the Debug menu and select Load LogixNGs Disabled. After responding OK to the message, load your panel file as you normally would. Your panel file will be loaded with all LogixNGs disabled.
After loading your panel file, open the LogixNG Table and verify that all LogixNGs are disabled. If you know which LogixNG is causing the trouble, you can then fix it or delete it, re-enable the other LogixNGs, and save your panel file. If you don't know which LogixNG is causing the problem, you can enable your LogixNGs, one by one, until the loop occurs. When the loop starts, you know that the last LogixNG you enabled is at least partly responsible for the problem. At this point you should restart the program with all LogixNGs disabled, and fix or delete the LogixNG you identified.
CAUTION: It's wise to save your panel file frequently when entering LogixNGs. If a logic loop occurs, it may be difficult, if not impossible, to save your panel file before shutting down the program. Remember that a LogixNG is activated as soon as you click Done in the Edit LogixNG window. Also, remember that hitting an Edit button in the LogixNG Table deactivates the selected LogixNG before opening it for editing, offering a possible way to break into a logic loop without restarting the program.
Scripts
All types of LogixNG actions and expressions may use Python/Jython scripts. Below follows the description of scripts for digital expressions, but the same pattern applies to all the types of actions and expressions.
The digital expression that handles scripts is ExpressionScript.
The script that is executed by ExpressionScript must declare a class that extend the class AbstractScriptDigitalExpression. The script must override the method evaluate(). For a script that listen to other beans, it's recommended to also override the methods registerScriptListeners() and unregisterScriptListeners().
When called, the script must tell the caller which class to use. It does that by setting the variable params._scriptClass.set(instance)
Example of a digital expression script:
      import jmri


      class MyExpression(jmri.jmrit.logixng.digital.expressions.AbstractScriptDigitalExpression):


        l = lights.provideLight(\"IL1\")


        def registerScriptListeners(self):

          self.l.addPropertyChangeListener(\"KnownState\", self);


        def unregisterScriptListeners():

          l.removePropertyChangeListener(\"KnownState\", this);


        def evaluate(self):

          return self.l.commandedState == ON


      params._scriptClass.set(MyExpression(params._parentExpression))
Indirect adressing of NamedBeans
In some cases, it may be useful to use indirect addressing of NamedBeans.
This can be done in two ways:
- Using a Memory that has the name of the NamedBean
- Using a NamedBeanMap to lookup the name of the NamedBean
Using a Memory that has the name of the NamedBean
Lets say we have an ActionTurnout that should throw a particulat turnout. But we wnat to be able to select which turnout to throw at a later time. We can solve that by storing the system name or user name in a Memory. We then tell the ActionTurnout to read the Memory and lookup the turnout on the fly.
Since LogixNG fully supports string manipulation and calculations of both integers and floating point values, where are plenty of possibilities here.
Warning
There is one major drawback with this. Since LogixNG doesn't know in advance which NamedBeans will be accessed indirectly, it's not possible for LogixNG to automaticly register listeners to the named beans that should trigger on change. For example, an ExpressionTurnout registers a listener on the turnout, if the name of the turnout is given, but if the ExpressionTurnout is using indirect addressing of the turnout, it's not able to do that.
The solution is to use the ActionListenOnBeans and tell this action which beans to listen on. Any time any property of any of the named beans this action listen to, the ConditionalNG will be executed.
Example:
A ConditionalNG is using turnouts IT1, IT2, IT3, IT4 and IT5 in it's expressions and wants each of them to trigger on change. Turnouts IT1 and IT3 and IT4 are directly accessed in expressions and IT2, IT3 and IT5 is indirect accessed.
Each turnout that is directly addressed in an expression will the ConditionalNG listen to automaticly, so IT1, IT3 and IT4 will be listen to. But in order to listen on turnouts IT2 and IT5, the ActionListenOnBeans needs to be used.
The ActionListenOnBeans can be placed anythere in the ConditionalNG tree, as long as it and its parents are enabled. If you disable this action, or any of its parent actions, the ActionListenOnBeans will not listen on its named beans.
Special actions
There are a couple of actions that is particular useful for this.
ActionFor
ActionFor is a for-loop. It has four children.
- Init - this action is first executed once. It's used to initialize the loop, for example setting a Memory to a particular value.
- Condition - this expression decides if the loop should run one lap more. The loop will continue to run until this condition will be false.
- Next - this action is executed at the end of the loop. It can for example be used to increment a counter in a Memory.
- Action - this action is executed in each loop. It does the main work.
Then ActionFor is executed, the Init action is run once. After that, the Condition expression is evaluated. If the condition returns true, the Action action is executed and at last the Next action is executed. Then the process is repeated, except that the Init action is only executed once.
ActionForEach
ActionForEach is a for-loop.
This action has a list of items. Either a constant list, or it can use a NamedBeanMap.
The ActionForEach action loops thru the list. It takes the first item in the list, assigns it to a Memory, and then executes its child action. Then it takes the second item in the list, assigns it to the Memory, and executes the child action.
List of digital actions
This section lists all the digital actions that is currently available with LogixNG.
Digital actions do something. Example: Set sensor IS2 to ON. Throw turnout LT52.
Digital actions have system names with the letters DA (for Digital Action). Example: IQDA002 or IQDA:0053. System names with colon are auto generated system names.
Items in red may need rethink or removal. I have ideas, but not always sure if these ideas are worth keeping. /Daniel
Items in blue is not up to date with documentation. The documentation tells how they should work, but the code is not finished yet. /Daniel
-
Light
The Light action sets a light.
-
Sensor
The Sensor action sets a sensor.
-
Turnout
The Turnout action sets a turnout.
-
Throttle
The Throttle action controls a throttle. It has child expressions for loco address, loco speed and loco direction. For now, an analog memory expression or an analog constant expression can be used to control the loco address and the loco speed, but once JMRI has support for AnalogIO devices, an AnalogIO may be used to control loco address and/or loco speed.
-
Timer
The Timer action executes a child action after some time.
-
DoAnalogAction
The DoAnalogAction reads an analog child expression and executes an analog child action.
-
DoStringAction
The DoStringAction reads an string child expression and executes an string child action.
-
HoldAnything
Remove this
The HoldAnything can hold any type of action or expression.
-
IfThenElse
The IfThenElse reads a digital child expression and if the answer is true it executes the then child action, else it executes the else child action.
-
Logix
The Logix action reads a digital child expression and then executes boolean actions. Each boolean action takes the result from the expression and takes action accordingly. The recommended child boolean actions for this action is the OnChange action. The Logix action, together with the OnChange child boolean actions, acts like the JMRI Logix, with explains the name of this action.
-
Many
The Many action executes many child actions.
-
ShutdownComputer
The ShutdownComputer action either shutdown or restarts the computer. This action is mainly included to demonstrate the possibilities of LogixNG, but it may be useful in some cases, for example when a Raspberry Pi computer runs the layout and there is no keyboard and mouse connected to the Raspberry Pi computer. It's then possible to use a sensor to shutdown the computer.
List of digital boolean actions
This section lists all the digital boolean actions that is currently available with LogixNG.
Digital boolean actions takes a true/false value and do something. The most common use is the digital action Logix together with the digital boolean action OnChange.
Digital boolean actions have system names with the letters DB (for Digital Boolean action). Example: IQDB002 or IQDB:0053. System names with colon are auto generated system names.
Items in red may need rethink or removal. I have ideas, but not always sure if these ideas are worth keeping. /Daniel
Items in blue is not up to date with documentation. The documentation tells how they should work, but the code is not finished yet. /Daniel
-
OnChange
Executes a child action if the parameter is changed and to the desired value.
List of digital expressions
This section lists all the digital expressions that is currently available with LogixNG.
Digital expressions asks a question and gives a true/false answer. Example: Is sensor IS2 on? Is turnout LT52 thrown?
Digital expressions have system names with the letters DE (for Digital Expression). Example: IQDE002 or IQDE:0053. System names with colon are auto generated system names.
Items in red may need rethink or removal. I have ideas, but not always sure if these ideas are worth keeping. /Daniel
Items in blue is not up to date with documentation. The documentation tells how they should work, but the code is not finished yet. /Daniel
-
And
The And expression has a number of child expressions and answers true if and only if all of the child expressions answers true. If any of the child expressions answer false, the And expression answers false.
-
Antecedent
The Antecedent expression has a formula together with a number of child expressions. It evaluates the formula with the results from the child expressions. The Antecedent expression follows the same rules as in a Conditional in Logix. A Antecedent formula can have parentheses and the words AND and OR to build the formula.
-
Light
The Light expression checks the state of a light and answers true if the light has the desired state.
-
Sensor
The Sensor expression checks the state of a sensor and answers true if the sensor has the desired state.
-
Turnout
The Turnout expression checks the state of a turnout and answers true if the turnout has the desired state.
-
False
The False expression always answers false.
-
True
The True expression always answers true.
-
Hold
The Hold expression has two child expressions, one trigger expression and one hold expression. For this expression to become true, both the trigger expression and the hold expression must answer true. But then it stays true as long as the hold expression stays true.
-
Or
The Or expression has a number of child expressions and answers true at least one the child expressions answers true. If all of the child expressions answer false, the And expression answers false.
-
Not
This expression does not exist yet. Implement it.
The Not expression has one child expression and answers true if the child expression answer false, and false if the child expression answers true.
-
ResetOnTrue
Update the code
The ResetOnTrue expression has two child expressions, one primary expression and one secondary expression. When the primary expression becomes true, the secondary expression is reset. This expression is primary designed to be used with a timer expression as the secondary expression. The timer will then restart when it's reset.
The user can select between four different ways on when this expression answers true.
- The primary expression trigger, and until the secondary expression becomes true.
- The primary expression trigger, and while the secondary expression is true.
- The primary expression stays true, and until the secondary expression becomes true.
- The primary expression stays true, and while the secondary expression is true.
Example usages for this expression:
- Wait on a timer. For example, when turnout IT1 is thrown, wait 5 seconds until expression becomes true.
- Wait on a timer. For example, when turnout IT1 is thrown, let the expression be true for 5 seconds.
-
Timer
The Timer expression waits some time then it's reset.
-
TriggerOnce
The TriggerOnce expression answers true one single time and then false until JMRI is restarted. It's designed to be used when something needs to be done exactly one time, for example set some turnouts to a specified inital state or to set some memories to some predefined values.
Thanks and congratulations to all who contributed!
Copyright © 1997 - 2018 JMRI Community.
JMRI®, DecoderPro®, PanelPro™, SignalPro™, TrainPro™, DispatcherPro™, OperationsPro™ and associated logos are our trademarks.
Additional information on copyright, trademarks and licenses is linked here.
Contact us via the JMRI users Groups.io group.
Site hosted by:
![]()
See also the site status page.