Using JMRI® to Operate Trains
OperationsPro: Cars window
This window is opened from the main PanelPro/DecoderPro® Tools menu, or from its Operations menu; and alternatively from Location pane Tools menu, Show Cars and various windows' Operations menus.
The Cars window allows you to view and edit your Car
Roster or add a Car by entering a Car's Number, Road, Type
and Length. The program will automatically calculate the
Car's weight based on length and the scale you are modeling.
Optionally the Car's Color, Build date, Load and Owner can be
added. You may want to switch a group of Cars as a unit, then
you may create a "Kernel". You can assign any number of Cars
to a Kernel but the type of the first Car assigned will be
used by the program to determine if the Kernel is allowed at
a Location. The entire length of the Kernel is used to
determine if the Cars in the Kernel will fit at a
Location.
Note that the program also includes space for each Car's
couplers when calculating the length of a Kernel.
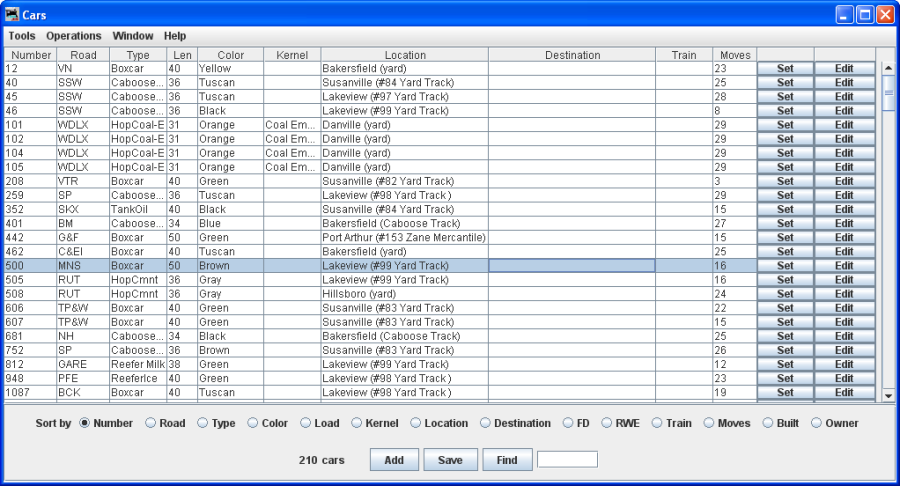
The complete Cars Roster is displayed:

To the right of each Car entry
opens the Set Car Location window.
opens the Edit Car window, similar to the Add Car window.
Bottom of the panel
A series of radio buttons that allow you to select the sort order. Also the total number of Cars is displayed.
opens the Add Car window and allows you to add a new Car to your Roster.
saves the Car Roster to disk.
Used to find a Car by its Road Number. The wild card "*" (without quotes) may be used when entering a car number.
For example, if you want to find all the Cars with a Number ending in ...345 , enter *345 and each time you press on the next Car with the ...345 ending will be displayed.
Instead of 14 identical Radio buttons, a more compact grouping of sort buttons fills the bottom of the pane. Clicking one of the buttons inside a grey rectangle hides the other items in the group and sorts the Roster. Selecting "Color" would hide the "Load" column and vice versa.

