JMRI: Signal Groups
Signal Groups are used to define a number of Signal Heads, where only one Signal Head can be illuminated at any given time, depending upon the status of the associated Signal Mast and a set of conditions.
Application
Signal Groups would be used where additional Indicators (displays) are used to support the main Signal Mast, such as:
These Indicators provide additional information to the driver that is not given by the main Signal Mast. Such indicators are frequently seen in Continental European and UK signaling.
Junction Indicators
A Junction Indicator can be configured to display anything
from 1 to 6 diverging routes. A single indicator will
frequently be found where a branch line diverges off from a
main line. Multiple indicators will be found in more complex
areas such as the approach to stations and good yards, where
multiple routes can be taken. The Junction Indicator informs
the driver that he is about to take a different route and
should therefore adjust his speed according to the
signage.
The Junction Indicators themselves will be set according to a
given set of Turnouts for that junction.
Route Indicators
A Route Indicator as used in the UK, will display a number
or letter. They are predominately found attached to Signals
on the approach to a Station and display which platform the
train has been routed into. Given the complexity of some
station throats, there may be a number of different physical
routes that could be take from the Signal to the destination.
Thus a Junction Indicator could not be used when tied in with
turnout positions. In addition the Junction Indicator can
only deal with 6 different routes, and some stations have
more than 6 platforms.
Therefore, the Route Indicator can only display one
destination at time. The displaying of a route doesn't
necessarily indicate that the driver will take the same route
to get to the destination platform.
Speed Indicators

A Speed Indicator as used in Dutch (Prorail) and Belgian (NMBS/SNCB) railways will display an illuminated digit below the main Signal Head, e.g. a "4" restricts the maximum speed to 40 km/h.
The Signal Group Table

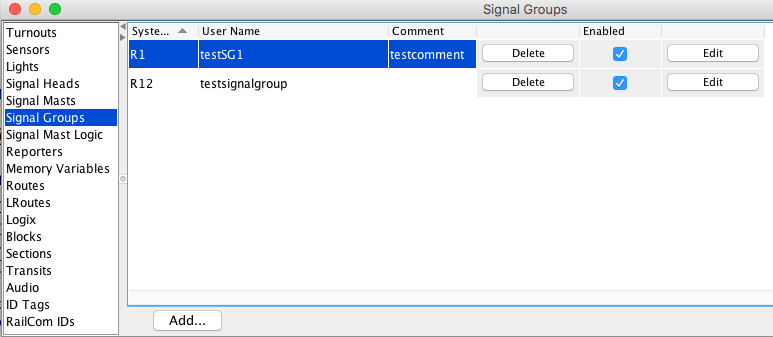
JMRI Signal Groups can be created and edited using the
Signal Group Table. You access this tool from the Tools
> Tables > Signal Groups menu of most JMRI
programs.
In the Signal Group Table you can create, change and delete
individual Signal Groups. You change the settings of a Signal
Group by clicking on the "Edit" button in the corresponding
line.
More information on configuring Signal Groups and an
Example can be found on the
Signal Group Table help page.
Creating a Signal Group
You add a new Signal Group by clicking on the "Add..." button at the bottom of the Signal Group Table, which takes you to the "Add Signal Group" panel.
Controlling a Signal Group
The information from the Signal Group Table is used by the Signal Mast Logic to calculate the specified behavior of a Signal Group. You can test this by manually changing one of the Indicator Signal Heads in de Signal Head Table.
Saving and Reloading Configuration
The Signal Groups information is saved as part of the JMRI configuration in an XML file, along with control panel setup and similar stuff. To store your panels in the same file (recommended), select File > Store > Store Configuration and Panels To File... or select Panels > Store Panels... in the main JMRI window.For more information on creating and displaying panels, including how to show Signals on your Panels, please see the Panels help pages.
Back to the Signaling main help page.
